How to install indoor led wall
1. Preparations
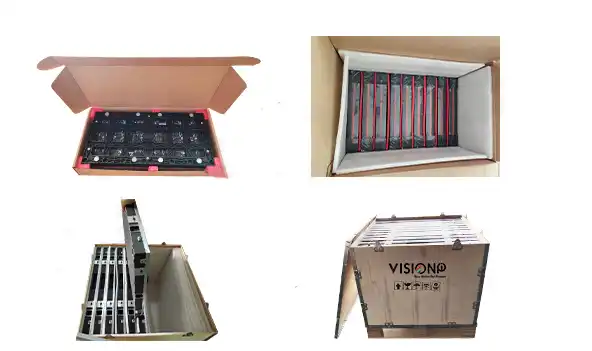
1.1. Unpacking
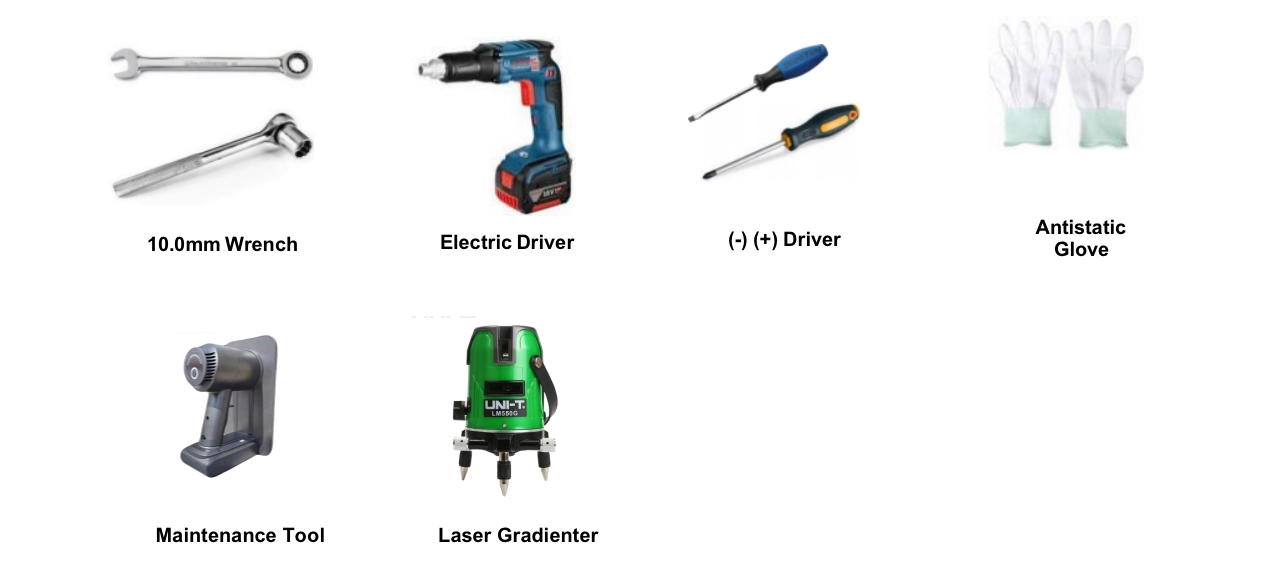
Warning: To prevent damage to the LED panel, wear anti-static gloves before installing/touching the display. After unpacking, do not place the display vertically on the floor, an accident such as a fall may be caused.
Die-casting LED Display Cabinets Installation
• Power cable;LAN cable (RJ45, CAT-5)
• Connection plates
• LED Controller
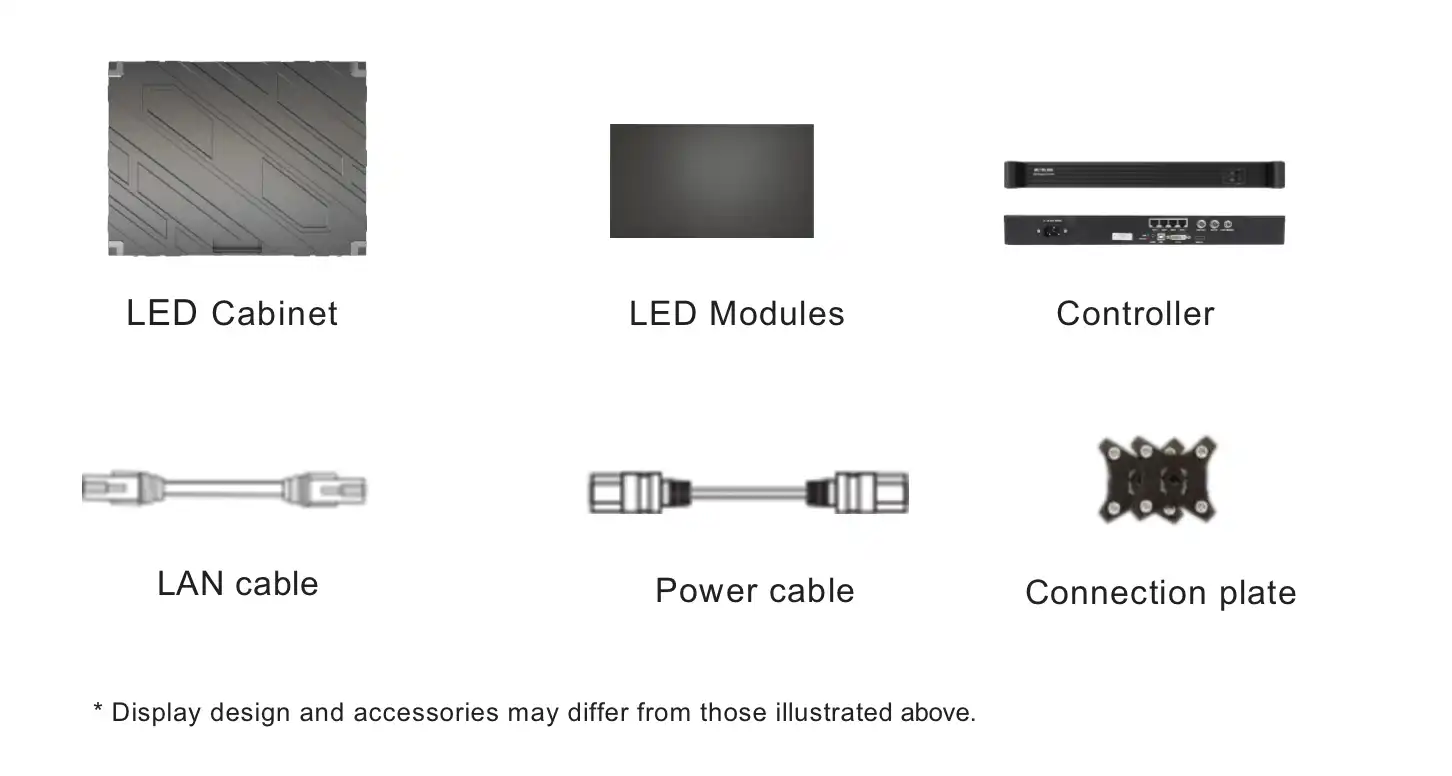
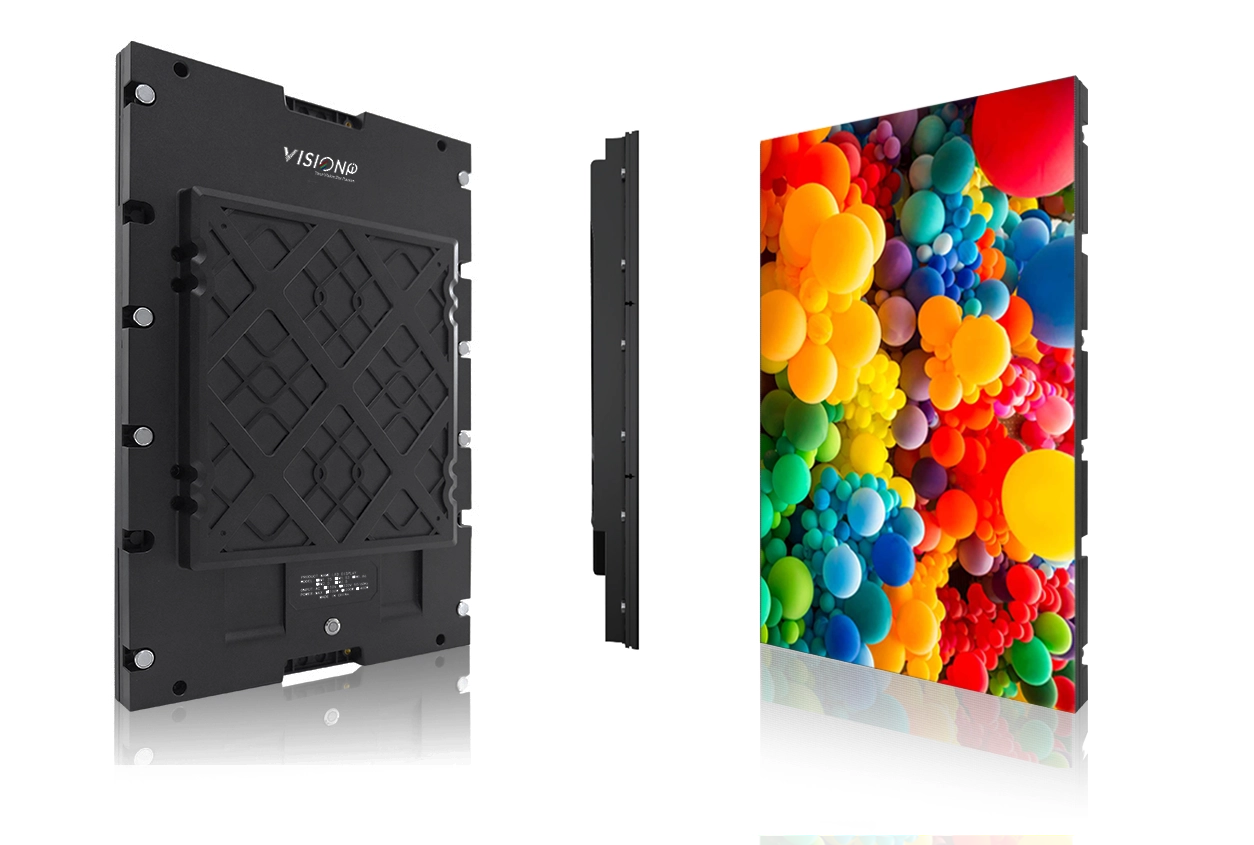
• LED Cabinets &LED Modules
• Power cable;LAN cable (RJ45, CAT-5)
• Connection plates
• LED Controller
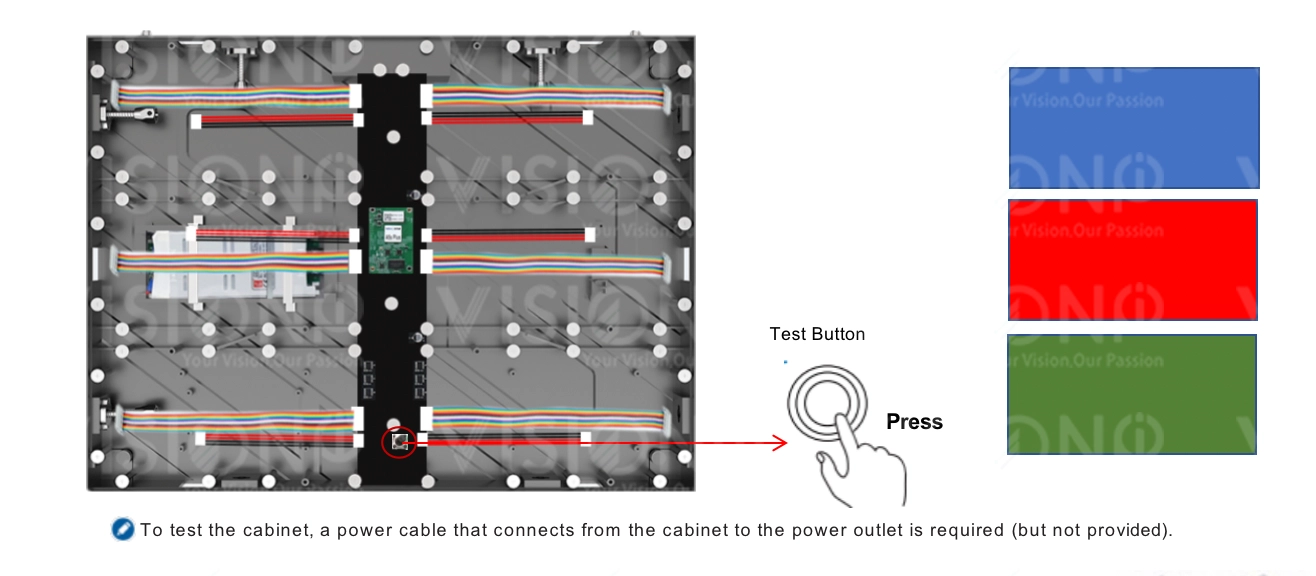
Press the CHECK button on the back of each cabinet to check if the product can operate normally.
2. Structure Installation
Precautions when handling the cabinets:
• Do not drop or apply shock/vibration to the product. Strong impacts may damage the component inside.
• Only a qualified service technician should perform the installation.
• Only use approved cabinets. • Be careful not to damage the corners of the cabinet.
• Install the display in a well-ventilated area.
• Always wear anti-static gloves when touching the display.
• Provide air conditioning around the LED display to allow heat dissipation away from the display.
• To maintain proper ventilation, keep clear space from the mounted displays to the wall. Installing the product in poorly ventilated spaces may damage the LED.
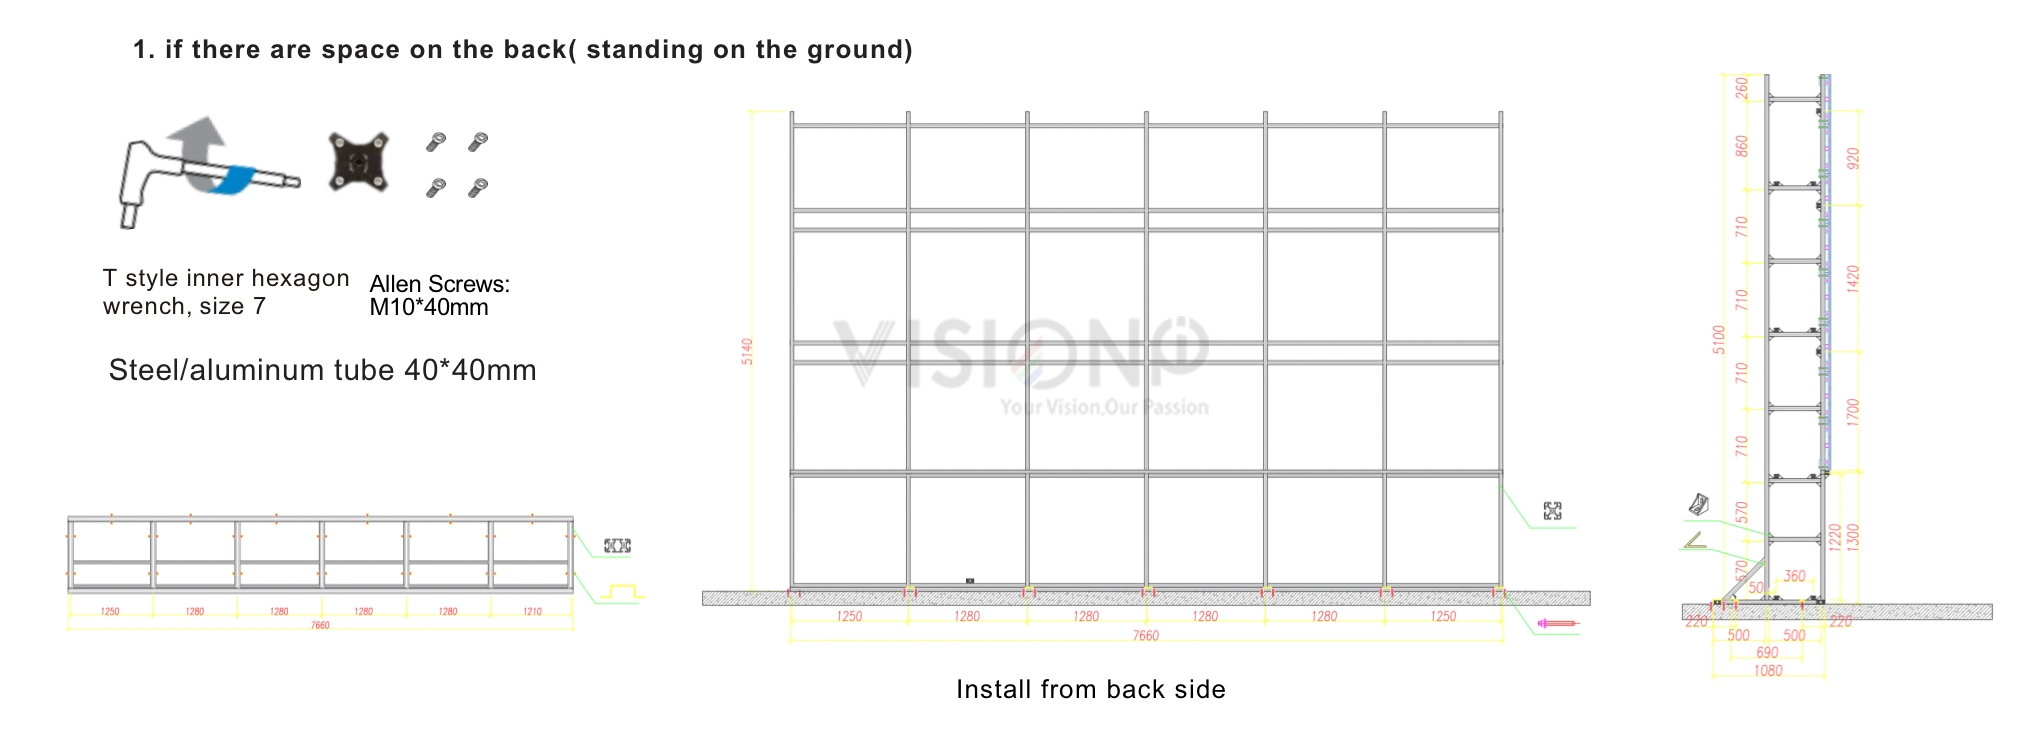
Wall Mount Kits
A wall mount kit is made of aluminum profile 40x40mm (in some regions sold separately or available from third party vendors) allows you to mount the LED display on the wall. For detailed information on installing the wall mount, see the instructions provided with the wall mount. Wall mounting can only be performed from the front side of cabinets.

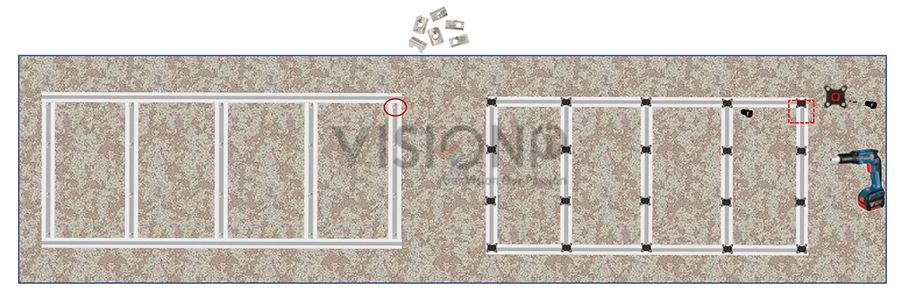
2. Insert the connection plate on the structure, and use the Allen screw bolt to connect the cage nuts.
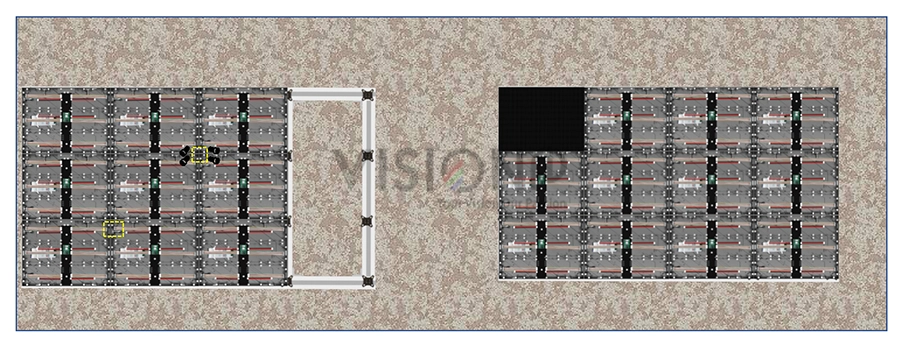
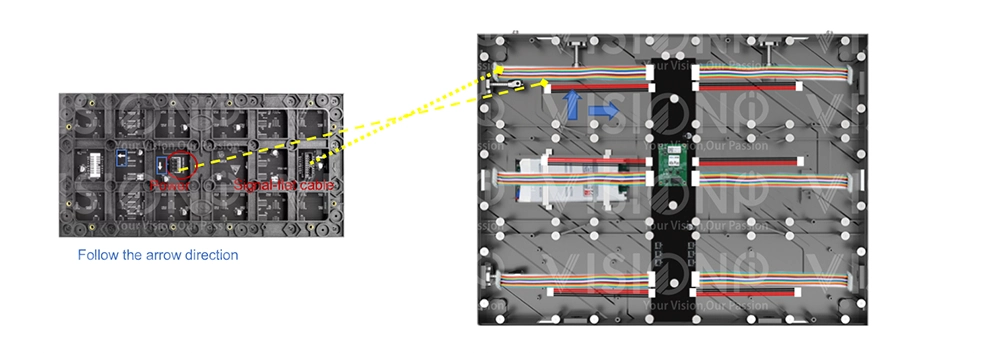
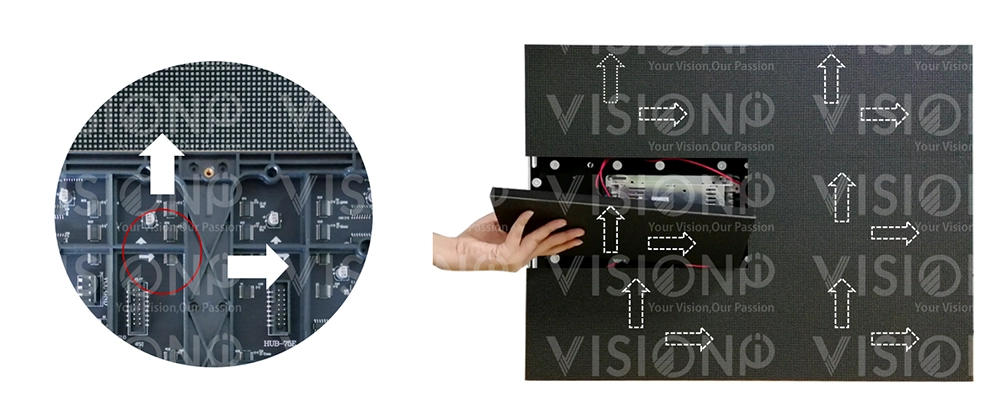
4. Install led modules (follow the arrow direction of the modules)
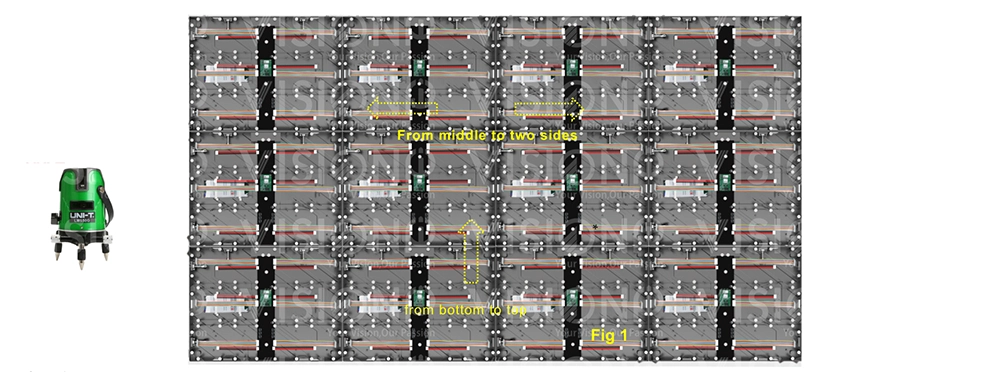
3. Cabinet installation
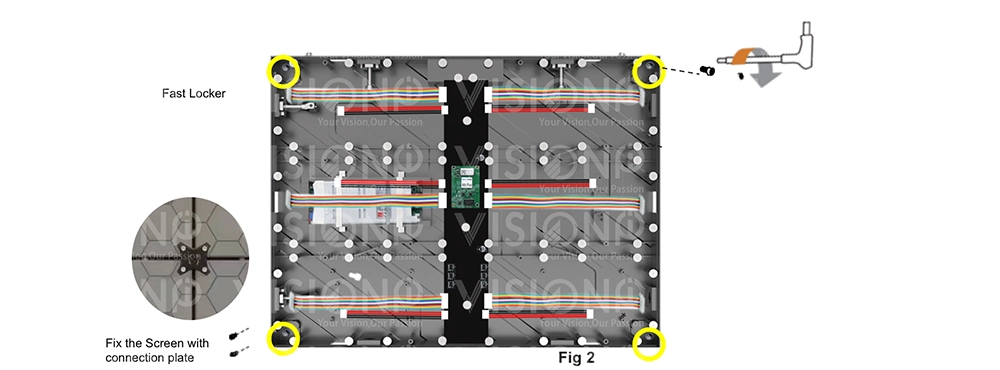
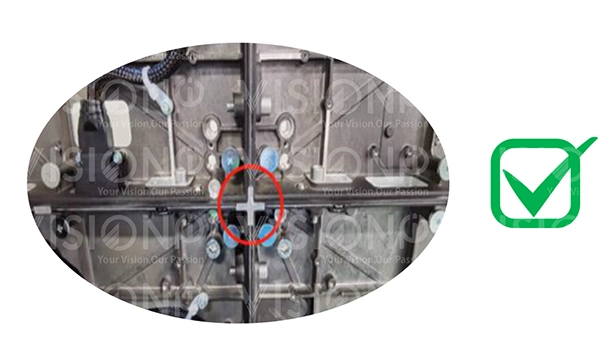
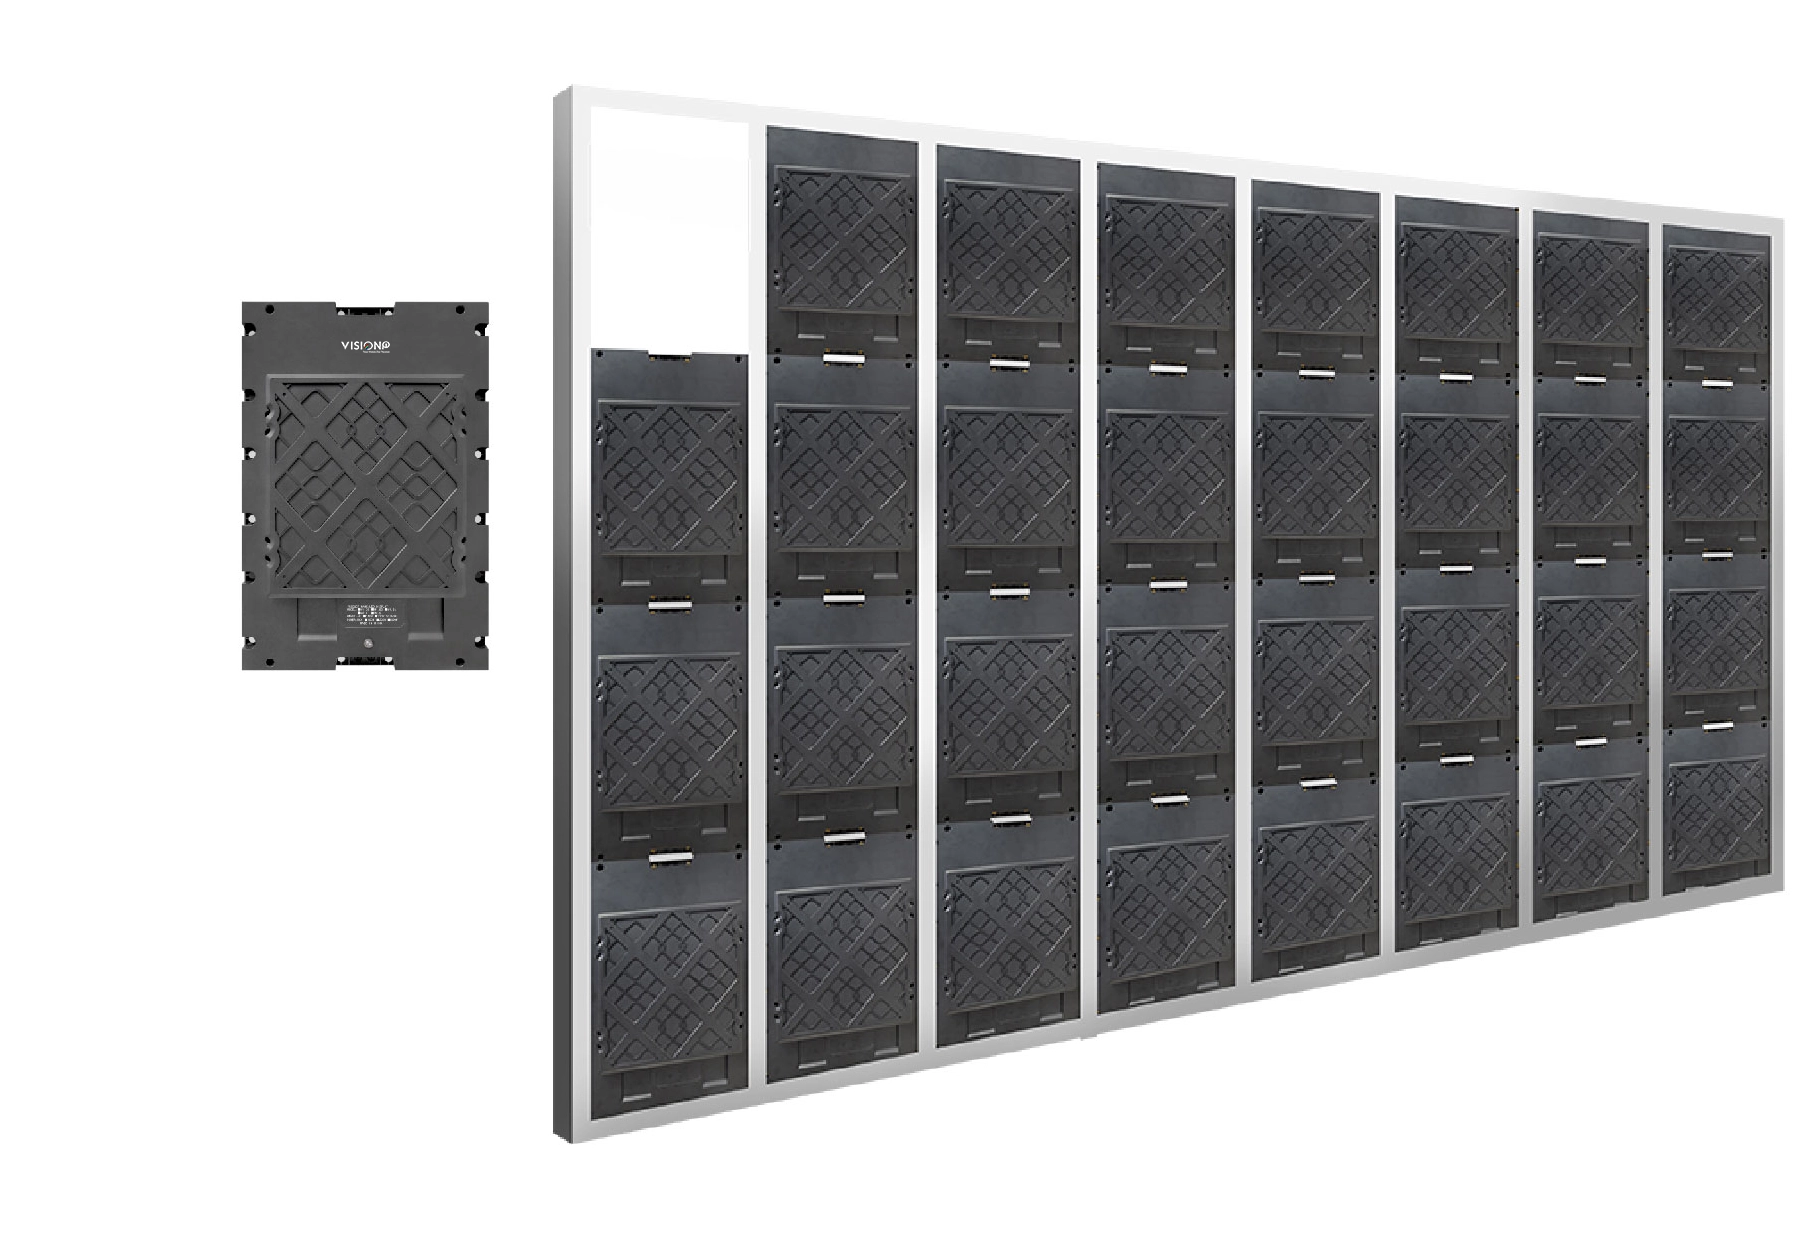
Step 1. Use a gradienter to adjust the flatness and verticality and then secure the cabinet to the connectors on the rack frames. Use connection plates to fix the screen. Start your installation from the bottom row. Install the connecting plates on the bracket (Fig 1). Rotate the hex key clockwise until the screw bolts are inserted, and fasten the fast locker on between two cabinets (left to right, up to down)(Fig2.) ※Do not fix the screws between the connectors and cabinets too tight for future adjustment.
4. Power and Signal Wiring
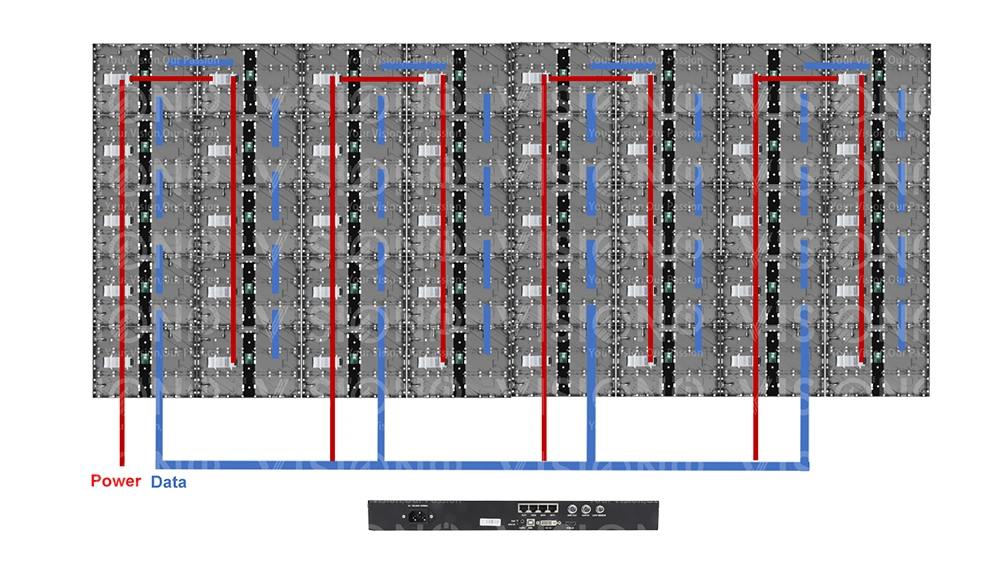
The data wiring process must follow a zigzag order between the cabinets, always starting from the one located at the bottom left. The modules are then connected to the data in and data out ports. Thanks to our system software we can verify the correct wiring of the entire screen with simple tests. Finally follows the color calibration and brightness setting.
5. LED Modules installation.
After check all the cabinets are well installed, attach the led modules to the cabinet, please check the arrow on the back of the PCB and follow the direction, and connect the flat cable and power cable from the hub to each of the modules. tips: to check the status of each led module on the cabinet, you can use one spare cabinet to test the condition of the led modules by pressing the test button on the hub.
Modular Cabinet 320x480mm Installation

I don’t normally comment but I gotta admit thanks for the post on this amazing one : D.
thank you !
Thanks for all of your efforts on this web page. Debby enjoys working on research and it is simple to grasp why. My spouse and i know all relating to the powerful method you produce valuable guidance on the blog and as well as recommend contribution from other people on this area then our own princess has always been being taught a lot. Have fun with the rest of the year. You have been doing a dazzling job.
I am extremely impressed with your writing skills as smartly as with the format in your blog. Is that this a paid subject matter or did you modify it your self? Either way stay up the excellent high quality writing, it is rare to look a great weblog like this one nowadays..
You really make it seem so easy together with your presentation but I find this topic to be actually one thing which I think I’d by no means understand. It kind of feels too complex and very large for me. I’m taking a look forward in your subsequent submit, I will try to get the hold of it!
As a Newbie, I am always browsing online for articles that can aid me. Thank you
Howdy! Do you use Twitter? I’d like to follow you if that would be okay. I’m definitely enjoying your blog and look forward to new updates.
Hey this is somewhat of off topic but I was wondering if blogs use WYSIWYG editors or if you have to manually code with HTML. I’m starting a blog soon but have no coding experience so I wanted to get advice from someone with experience. Any help would be greatly appreciated!
Very great visual appeal on this site, I’d rate it 10 10.
I’ve been absent for a while, but now I remember why I used to love this blog. Thank you, I?¦ll try and check back more frequently. How frequently you update your website?
Nice blog here! Also your website loads up fast! What host are you using? Can I get your affiliate link to your host? I wish my web site loaded up as fast as yours lol
I am glad to be a visitant of this double dyed blog! , thanks for this rare information! .
Some truly nice and utilitarian information on this website , likewise I conceive the design contains good features.
Spot on with this write-up, I truly suppose this website wants far more consideration. I’ll most likely be again to learn way more, thanks for that info.
Sweet blog! I found it while searching on Yahoo News. Do you have any tips on how to get listed in Yahoo News? I’ve been trying for a while but I never seem to get there! Appreciate it
Hi there this is somewhat of off topic but I was wondering if blogs use WYSIWYG editors or if you have to manually code with HTML. I’m starting a blog soon but have no coding experience so I wanted to get guidance from someone with experience. Any help would be greatly appreciated!
I’m so happy to read this. This is the type of manual that needs to be given and not the random misinformation that is at the other blogs. Appreciate your sharing this best doc.
Hi there, I found your web site by way of Google whilst searching for a similar subject, your site came up, it appears great. I have bookmarked it in my google bookmarks.
I like this web site its a master peace ! Glad I detected this on google .
I think other website owners should take this site as an model, very clean and great user genial pattern.
Woh I love your content, saved to fav! .
There is visibly a bundle to realize about this. I believe you made various nice points in features also.
Thank you for the good writeup. It in fact was a amusement account it. Look advanced to far added agreeable from you! However, how can we communicate?
Fantastic blog you have here but I was curious if you knew of any message boards that cover the same topics talked about here? I’d really like to be a part of community where I can get feedback from other knowledgeable people that share the same interest. If you have any suggestions, please let me know. Cheers!
Hello there! This is my first visit to your blog! We are a group of volunteers and starting a new initiative in a community in the same niche. Your blog provided us valuable information to work on. You have done a outstanding job!
Hello there, just changed into alert to your weblog thru Google, and found that it’s really informative. I’m going to be careful for brussels. I will appreciate if you continue this in future. Lots of people will likely be benefited out of your writing. Cheers!
Spot on with this write-up, I really think this website needs rather more consideration. I’ll probably be again to learn far more, thanks for that info.
I view something really interesting about your site so I saved to my bookmarks.
Your place is valueble for me. Thanks!…